Showing posts with label desserts. Show all posts

Thursday, January 14, 2010

sidetracked by snowflakes


We've been spending a good deal of time Welcoming Winter here recently. But Zeal was sad that the recent rains had melted all the snow away and his daily treks to the "sled run" were becoming less, well, just "less".
So I dragged him into the kitchen to help make some tortilla bowls to hold our favorite guacamole salad for dinner. Well, it wasn't really dragging since he was quite pleased that that would be our dinner.

Instead, we got inspired to use our tortillas for a sweet afternoon treat, Snowflake Crisps (his name for them).

Here's what we did:
1. Soak 1 flour tortilla in a pan of warm water with 1/2 teaspoon of oil. Remove from water after about 10 seconds and blot dry.


2. Fold tortilla in half and half again, and then in half again one more time (three times).


3. Cut on the folds as you would a paper snowflake.


4. On a cookie sheet with parchment paper, bake for about 5-10 minutes in 400 degree oven, or until slightly crispy.


5. Remove from oven. While still warm, brush with butter...


6. And sprinkle with sifted powder sugar or a cinnamon-sugar mixture. Or both :)


Yummy yummy snowflakes! And Zeal just loved the snowflake pattern left on the parchment.:


We never did get around to our tortilla bowls and ended up warming up leftovers. Something for tomorrow's dinner, I guess.

Friday, April 10, 2009

nests updated


We had a few extra supplies and so revisited the crispy treat nest project yesterday. This time, we used a muffin tin (lightly oiled) when forming the nests. It worked wonderfully! It was much easier for the kids to get a nest shaped, and they were able to work on them while the mixture was still warm. Some of the kids used a spoon to get the nest shape and some used their fingers. Both methods worked well, and the nests quickly filled with many different "eggs" fit for snacking from in between the active play moments of the afternoon.

So if you're looking for a little cooking project for your holiday weekend, this one is for all the cool kids!

Monday, April 6, 2009

getting nesty!


From the little golden nest that hangs from the living room reading lamp (the subject of the mythology of the living room buzzard), to the papîer-måché nests that live with the fairy houses, we've been really getting nesty these days. So why would our food be any exception?

In celebration of spring and all this lovely bird watching weather we have been having lately, we made some little nests fit for snacking. We used the time-honored crispy treat combination, but substituted Fiber One cereal to make it more stick and twig-like. We formed them into little nest shapes and added some locally made speckled chocolate eggs we found. Of course, jelly beans, jordan almonds, or any other egg shaped candy would work just as well.

Happy nesting!

Friday, March 27, 2009

dessert for breakfast - strawberry napoleons!


I woke up one morning last week to a sign hanging in the entry to the kitchen that read:

Dear Mom,
Can you help me make strawberry napoleons when I wake up?
Love,
Zeal


It was so sweet; I can't believe I didn't get a picture of it before it got repurposed.

Well, as you might know, strawberry napoleons are a rather sweet dessert, NOT a breakfast item.

But, yes, I am usually up for the challenge of turning dessert into breakfast, so here is what we did:

1. Bake puff pastry sheets.
2. Split baked puff pastry sheets (top from bottom) and cut into appropriately sized individual pieces.
3. Whip some cream (we use our vitamix blender for a quick whip) - leave it unsweetened.
4. Add some Dr. Oetker's organic vanilla pudding and mix with the whipped cream.
5. Slice strawberries into a bowl.
6. Set up your assembly line (assembly line cooking is always a perfect way to involve the little ones in any project - sushi, sandwiches, desserts like this!):


7. Enjoy!

Monday, March 16, 2009

a great day for a tea party!

The weather has been weird and typically pre-spring. Off and on rain. And nothing says tea party around here like a good sudden thunderstorm.

It's been a long while since we have had such a party, the kind that call for some stuffed friends and a dig in the costume box, er, I mean "costume closet" as the costumes seemed to have piled up way too far these days. It seems we need a thinning. Anyway, you get the picture... costumes are required at his kind of tea party.

Here's a few scenes from the kitchen as we got to work on our orange scones that were to be the main course at the party:


We used this recipe from Martha (one that came highly recommended) but veganized it by souring some hemp milk (a cup of the milk and 1 T. vinegar) instead of buttermilk and using earth balance instead of butter.
I might add here that scones are a great project for kids because they lend themselves so well to the cutting and shaping only little hands can provide.

They came out just beautifully...


And here we are getting the tea ready, selecting the herbs and flowers to make it just the perfect blend:


And finally, the table is set, the tea is served, and the scones are... devoured!


Just in time for the sun to come out again.

Sunday, January 18, 2009

Birth Day cake

For those of you who read my other blog, The Wondershop, you already know about the birth of our daughter Anjali.


She is three weeks old today, and I just can't believe how big she has already gotten and how fast the last three weeks have flown.

When we were planning her birth, one of the things Zeal had settled on was that he wanted to make her a birthday cake. We figured it was a wonderful activity for us to do together when I was in labor, before real active labor began. And so we did. Only we did it a few days early when we had what can only be called a "false start". We kept it for a few days and pulled it out when the time was right, when we could actually celebrate the eating of it with a baby. And as it turned out, it was a good thing we did make it a few days early, because her very quick arrival left very little time for cake making.

Here it is...


Our Birth Day Buckwheat Carrot Cake, a hearty, healthy sweet in honor of our little sweetie!

The recipe is as follows:

Buckwheat Carrot Cake
*Since we had used all of our baking products with our holiday cooking, we made this cake with buckwheat pancake mix instead of flour, baking soda, and powder. It worked out wonderfully! I highly recommend trying it sometime.

Ingredients:
1 cup sugar
2 cups buckwheat pancake mix*
2 tsp cinnamon
2 cups finely grated carrots
1 cup crushed pineapple
1/2 cup chopped nuts (we used pecans)
1 cup coconut
4 eggs (we used Ener-G egg replacer equivalent)
1 cup vegetable oil

Directions:
Mix together pancake mix, cinnamon, sugar, oil and eggs. Blend in thoroughly carrots, pineapple, nuts and coconut. Pour into a greased springform pan. Bake at 350 degrees for 45-55 minutes or until a knife inserted comes out clean. Cool. Frost with a mixture of cream cheese and agave nectar (sweetened to taste).

::

We have been so fortunate to have been showered with love and support and amazing food these last three weeks as we settled into our expanding family. So while we have been doing very little cooking lately, Zeal is anxious to get back into the kitchen. In the coming months, Zeal and I are sure to be much more regular here than we have been in the last few weeks, and as Anjali eventually begins her own experimenting with food, I'll probably also share some baby food making as well.

Thank you all for the love and welcoming of Anjali!!

Wednesday, December 10, 2008

...and what to do with the leftover gingerbread?


And after making that traditional little house, we used the leftover gingerbread to make a few little men to nibble on. We popped them in the freezer and have been pulling out one a day (or every other) to decorate.

For easy decorating, add a tablespoon of icing to the corner of a ziploc bag. Make sure the bag is closed tightly and cut a very tiny hole in the corner. Instant kid-friendly (an inexpensive) pastry bag!

Sunday, December 7, 2008

Mama's Nuts

What happens when said child is working intently on a science fair project and pregnant mama gets a hankerin' for the pecans waiting patiently for her in the kitchen...


Mama's Cinnamon Nuts (You must, must, must try these!)

Ingredients:
1 cup sugar (maple or cane)
1/2 tsp. cinnamon
2 1/2 cups pecans or walnuts (NOT chopped)
1/2 tsp vanilla
1/8 tsp. cream of tartar
1/4 c. boiling water

Directions:
Mix sugar, cinnamon, cream of tartar and boiling water and boil (to 246 degrees, if you have a candy thermometer, or until mixture forms a "ball" if you drop a bit of it in cold water). Add nuts and remove from heat. Add vanilla and stir until mixture sugars on the nuts. Quickly turn on a flat surface and separate the nuts.

You will not regret giving these EASY little treats a try! I promise. But beware, they don't last long!

Thursday, November 6, 2008

How to Bake a Pumpkin & Pumpkin Pie Bars

We've been having fun just slowing down, which means spending a bit of time with our pumpkins. Here's what we did with our sugar pie pumpkins.

How to Bake a Pumpkin

Quarter pumpkin.


Work with a friend to scoop out the seeds. (Of course, save a few of the seeds for planting next year and the rest for roasting.)


Place the quartered pumpkin in an oven proof bowl. Drizzle with a bit of olive oil. Pour about 3 cups of water over the pumpkin. Cover and bake for about an hour (or until soft) in a 350 degree oven.


Scoop out pumpkin and purée in a blender.


And then, make whatever pumpkin goodies your little hearts desire.
Here's our pumpkin pie bars. So yummy!


Here's our recipe (made up that very day):

Pumpkin Pie Bars
Ingredients:

Bars:
2 cups flour (we used 1 cup of teff flour and 1 cup buckwheat)
1 cup sugar
2 teaspoons baking powder
1 teaspoon baking soda
2 teaspoons pumpkin pie spice
1/4 teaspoon salt
1 cup olive oil (or whatever oil you like to bake with)
puréed pumpkin from one average-sized sugar pie pumpkin
3 eggs (we used Ener-G egg replacer)

Topping:
Mix a little powdered sugar with a bit of milk (we used soy)

Directions:
Combine dry ingredients. Add wet ingredients and mix thoroughly.
Bake in a 350 degree oven for 25 minutes, or until a toothpick comes out clean. Drizzle topping and let cool. Cut into bars.

Monday, October 13, 2008

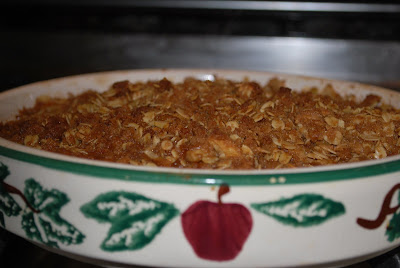
Best Apple Crisp!

If you buy one new gadget this year/season, let it be an apple-corer-peeler-slicer! We've been having fun lately with ours coupled with all the apples we're getting in our own backyard.


Here's our favorite recipe for apple crisp, which freezes wonderfully for a fabulous winter dessert!


Our Best Apple Crisp

Preheat oven to 375 degrees.

Cream together:
1/4 cup butter
3/4 cup lightly packed brown sugar

Stir in until crumbly, a mixture of:
1/4 cup flour
1/2 cup rolled oats
1/4 tsp cinnamon

Arrange in a greased pan:
4-6 peeled and sliced apples.

Sprinkle with crumb topping.
Bake in preheated oven for 40-50 minutes or until apples are tender and topping is golden brown. Serve warm.

Thursday, September 11, 2008

Did I say, "Enough for ONE pie?"


I meant 32!

Okay, it looked like we had picked blackberries enough for one whole pie, which we were actually pretty excited about.

Until... Zeal pulled out this old favorite kitchen tool - a pastry mold - and we decided to make a bunch of little snack pies instead. Now he's jumping up and down about it; he's so pleased!


So we ended up with 8 for us now (enough for dessert tonight and leftovers for lunches tomorrow)


and...


24 to stick in the freezer for yummy winter snacks:


And so begins our freezer journey... more to come, for sure.

Sunday, September 7, 2008

Lego Crispies! (and our little kitchen tool of the week)

We got a new mold, in the form of Zeal's latest favorite past time, lego bricks!


We originally bought this to make lego cakes for a special party Zeal is planning, but they keep getting used as "trial runs". So fun!
Number one use for these molds - crispy revivals.


Here's a photo of the final product. You can't really see the circles on the top of the legos here. There's talk of painting the tops with melted chocolate next time. I like that idea!


Zeal is also aware that lego ice cube trays exist and is making plans for how he will use them (candy making plans, that is).

Molds are an especially fun (and easy) way to get kids excited about whatever it is you are cooking (biscuits, muffins, sidewalk chalk, etc. etc. etc.) We also have some other molds in the shape of: moon and stars, puzzle pieces, and lines (which we've made lemonade "stir sticks" out of. Do you have a favorite mold?

Wednesday, August 20, 2008

Crispy Treats, Part II

We decided to make some after dinner Rice Crispy Treats again. This time, Zeal was making them on his own (with his mom, of course, just no friends this time.)

Again, this is an easy-peasy recipe for him to get through all on his own (with a little verbal guidance) and he loves being able to work at the stove "like an adult".


This time, we used:
4 T. Earth Balance
1 container of Suzanne's Rice Mellow Cream
1/2 cup peanut butter
5 cups of Natural Directions Crispy Brown Rice

Here's the process from the first time we did this together.

Here's what came of the treats once cooled and cut: A Crispy Castle, that ended up turning into a train because of course it needed to drive right into his mouth.


Don't worry, he didn't eat them all at once; I managed to save most of them away for snacks for the week.

Very yummy, vegan, and gluten free!

Saturday, August 9, 2008

Swirl Cream

We're on a homemade ice cream kick, and it is truly yummerific! Our latest foray was vanilla, with real vanilla beans (is there any other way when going homemade?) And we all had our way of wanting to eat it. While I was reaching for the organic chocolate syrup, Zeal got a stool and went searching in the highest cupboard, where he knows I keep the stuff we "never get to use" - sprinkles!

Here's his version of Swirl Cream, turning a lovely shade of grey as all those yucky colored sprinkles start to dissolve into the melting perfectly fresh, organic, vegan vanilla ice cream.


So much for trying.

Friday, August 8, 2008

Screaming for Ice Cream: Summertime Creativity Tastes so Good


from the August edition of Wonderwise:

Screaming for Ice Cream: Summertime Creativity Tastes so Good

It’s that lovely time of year again, and the heat is on. What better way to cool down and give your kids a creative boost than with a few yummy frozen treats? Fortunately, there are lots of ways for children to get creative when ice cream is the medium. Here are a few ideas to get you going on your frozen adventures:

Ice Cream in a Can
There’s nothing quite like homemade ice cream. Crafting a batch of your own can really get your kids rolling in creative fun. To get started, you will need two clean metal cans (one smaller than the other) with lids. To the smaller can, add one cup of milk (and milk will do: coconut, whipping cream, or try soy creamer for a real treat), sugar (to taste- I prefer mine less sweet) and one tablespoon of vanilla. Place the smaller can inside the larger one and surround with ice and rock salt. Make sure the lids to your cans are sealed tightly and roll the can back and forth on the ground for about a half an hour. This is also a great time to get some pre-eating energy out and play “kick the can”. Pure yummy fun!

Ice Cream in a Bag
Don’t have the half hour it takes for the canned version of homemade ice cream? Try shaking up some summertime delight with ice cream-in-a-bag, which only takes about five minutes. Similar to making it in a can, you will need two plastic sealable bags (one pint sized and one gallon sized). In the small bag, put one cup of milk or half & half, two tablespoon of sugar, and ½ teaspoon of vanilla. Seal the bag tightly. Fill the larger bag half full of ice and add 6-7 tablespoons of rock salt. Place the smaller bag inside the larger one and seal carefully. Shake until the mixture becomes ice cream, about five minutes.

Juicer-style Ice Cream
Looking for an ice cream made from whole foods? Run your frozen fruits through your juicer to make a wonderfully healthy ice cream your kids will scream for. Frozen bananas make an incredible soft serve treat; you won’t believe it is only banana. We especially like using frozen mango pieces for a tropical sorbet. Top with some freshly picked berries and a spring of fresh mint, and ooh-la-la!

Sandwiches Your Way
Once you have your ice cream made, the possibilities open up for some more creation fun. Use your favorite pre- or homemade cookies to serve up some ice cream sandwiches. Our favorite way to make ice cream sandwiches is to make a pan of thin gingerbread. After baking, cut into squares or use cookie cutters to give your sandwiches even more personality. If you have large batches of cookies and ice cream, stock your freezer with sandwiches to last the rest of the summer.

Ice Cream Social Forays
Step back in time to the simple pleasures of a hot, summer afternoon. You and your children can have a great time, learn a lot, and make all your friends and neighbors very happy by creating your very own neighborhood ice cream truck.
Load up a wagon, wheel barrel, cart, or whatever you can find with your frozen yummy treats. Include ice cream, frozen banana slices (we dip ours in chocolate!), homemade popsicles (made from different fruit juices and poured into an ice tray or other small shape with a stick), and fruit smoothies. Don't forgot a cooler, ice, a sign with your options and prices, a box for collecting money that includes change, a towel, cups, bowls, cones, spoons, napkins and other necessities. Offer music as you travel through the neighborhood, letting everyone know the ice cream truck is in business!

Scoop up the last bit of summer with some treats that will have everybody smiling. You’ll be dripping with enough sticky creativity to last you through even the hottest days. Enjoy!

Thursday, August 7, 2008

Mmm, Mmm, Strawberry Ice Cream...and it's vegan!

Yippeee for an August heat wave. Man, I love this stuff!
No better time to get going on some ice cream.
We're experimenting with a vegan variety with the strawberries that came in our CSA box.

Here's what we're working with:


ice, rock salt, 1 cup of soymilk, 1 pint vanilla soy creamer, strawberries (sliced), a bit of arrowroot, and 2/3 cup of sugar (forgot the rock salt in the photo) - Yes, that's Zeal hitting the ice with a hammer to move this process along just a little bit faster!

Here's what to do:
Blend everything together except the rock salt and ice and transfer to ice cream maker.


This is a hand-me-down ice cream maker from my childhood; still works fabulous! Thanks Mom!
Zeal was loving being the official "keep-your-eye-on-it-and-add-more-ice-and-rock-salt-guy"!


25 minutes later:


This is what you call "getting to lick the spoon!"


Yumm!!!!!

Friday, August 1, 2008

Of Plums and Cousins

While on our recent road trip to spend time with grandparents and cousins, we stopped at the home of our beloved friends who we see only a few times a year. Lucky for us, their plum tree was bearing more fruit than they could handle and they sent us on our way with a nice big bag of purple plums.

So we started eating them in earnest, but still didn’t seem to make a dent in our crop. We arrived at Grammy’s, and of course with her kitchen filled with books, we found a few possibilities for things to make with our stash of plums. We settled on a recipe from the cookbook Barefoot in Paris, a Plum Cake “Tatin”, an apparent take on the French classic usually made with apples.


A wonderful treat when you are fresh from waterfall play with cousins:


Here's all that remained after dessert that evening; it got promptly eaten with somebody's morning coffee.


So we made another one.
Here's the five star recipe:

Plum Cake “Tatin”
Serves 6

6 Tablespoons unsalted butter, at room temperature, plus extra for greasing the dish
10-12 purple “prune” plums, cut in half and pitted
1 ¾ cups granulated sugar
2 extra large eggs, at room temperature
1/3 cup sour cream
½ teaspoon grated lemon zest
½ teaspoon pure vanilla extract
1 cup plus 2 tablespoons all-purpose flour
½ teaspoon baking powder
¼ teaspoon kosher salt
confectioners’ sugar

Preheat the oven to 350 degrees. Generously butter a 9-inch glass pie dish and arrange the plums in the dish, cut side down.
Combine 1 cup of the sugar and 1/3 cup water in a small saucepan and cook over high heat until it turns a warm amber color, about 360 degrees on a candy thermometer. Swirl the pan, but don’t stir. Pour evenly over plums.
Meanwhile, cream the 6 tablespoons of butter and the remaining ¾ cup of sugar in the bowl of an electric mixer fitted with the paddle attachment, until light and fluffy. Lower the speed and beat in the eggs one at a time. Add the sour cream, zest, and vanilla and mix until combined. Sift together the flour, baking powder, and salt and, with the mixer on low speed, add it to the butter mixture. Mix only until combined. Pour the cake batter evenly over the plums and bake for 30-40 minutes, until a cake tester comes out clean. Cool for 15 minutes, then invert the cake onto a flat plate. If a plum sticks, ease it out and replace it in a design on top of the cake. Serve warm or at room temperature, dusted with confectioners’ sugar.

Friday, June 27, 2008

Toe Tappin' Tapioca!

When Zeal cooks, he often spends a lot of the time singing and tapping his little toes to whatever song he has made up about the food he is making. Late last night (you know those summer nights that just beg to be activity laden because it is late but the sun is still up) he decided he wanted to make some tapioca pudding.

The song went:
TAP TAP TAP--I-OOOOOOOOO-CA!

And this little jar sure made a great shaker to add to the song and dance:


Here's our tapioca recipe, vegan with a tropical flair:

Coconut Tapioca Pudding
Ingredients:
1 can lite coconut milk
1 cup soy milk
½ cup tapioca pearls
½ cup sugar
3 t. egg replacer
1 t. vanilla

Directions:
Soak tapioca pearls in 1 cup of water for 15 minutes. Add drained tapioca to coconut and soy milks and bring to boil. Simmer for 5 minutes. Add sugar and egg replacer and whisk until thoroughly blended. Bring to boil again and stir constantly for 2 minutes. Let simmer for 10 minutes. Add vanilla. Serve warm or cold.


We made a double batch, but this stuff just doesn't last very long.
Welcome! Here you will find simple recipes, inspiring ideas, personal stories, inspiration, and tools to experiment and explore the kitchen together.  So enter the family kitchen with absolute abandon, and begin your journey towards thinking outside the recipe!